How to Install Kitchen Sink Plumbing
Installing kitchen sink plumbing can be an empowering DIY project for homeowners and DIY enthusiasts alike. Whether you are updating your kitchen’s plumbing system or replacing an old sink, this guide will provide you with the necessary steps to ensure a successful installation. This comprehensive guide covers everything from preparation to connecting the plumbing, helping you avoid common pitfalls and ensuring a leak-free setup.
Understanding the Basics
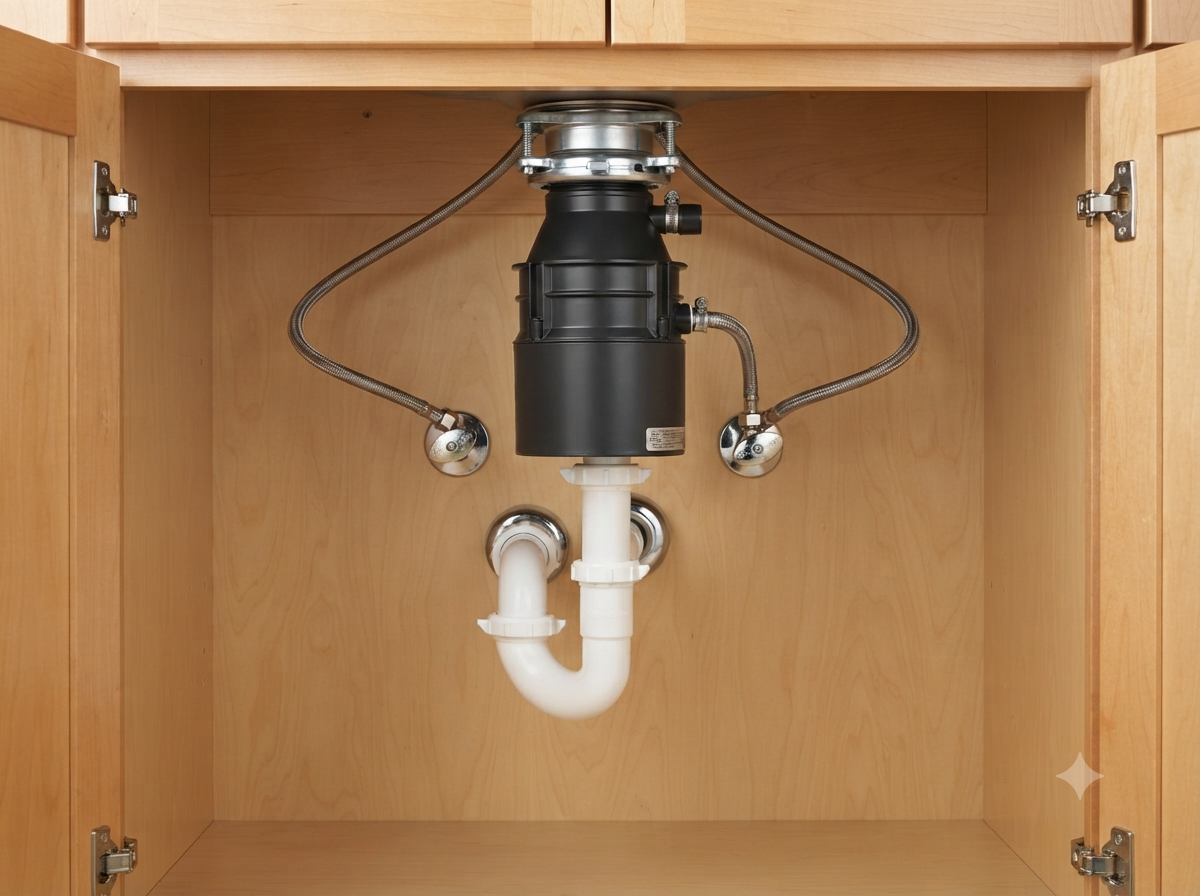
Before diving into the installation process, it’s crucial to understand the basic components involved in a plumbing system. Indoor plumbing has come a long way since it was first invented, and today’s kitchen setups are far more efficient. A typical setup includes the sink itself (a plumbing fixture), faucet, drain pipes, P-trap, and water supply lines. Familiarizing yourself with these components will pave the way for a smoother installation process.
Tools and Materials Needed
Gathering the right tools and materials beforehand — and keeping them organized — is essential for an efficient installation. Here’s what you’ll need:
- Pipe wrench
- Basin wrench
- Adjustable wrench
- Pipe cutter
- Teflon tape
- Silicone sealant
- Plumber’s putty
- Mounting clips
- Compression fitting
- Sink flange
Preparing for Installation
Safety Precautions
Ensure safety by shutting off the water supply at the angle stop to prevent any accidental leaks or flooding. Additionally, clear the area under the sink to provide ample space for maneuvering and installing components.
Pre-Installation Checks
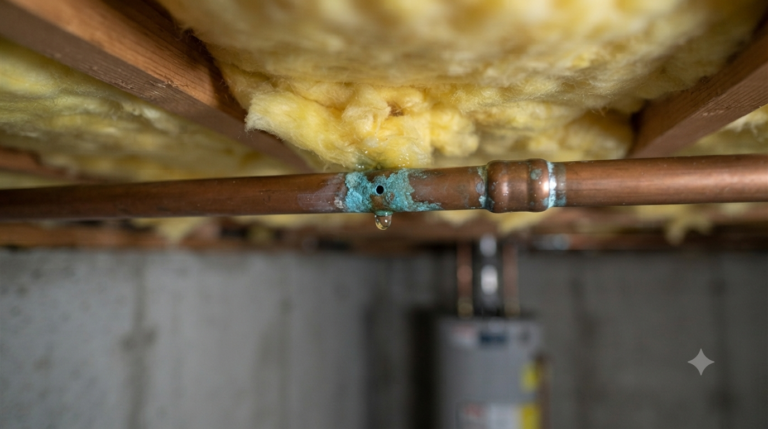
Inspect the existing plumbing setup for any signs of wear or damage, including pinhole leaks in copper supply lines. If you’re replacing an old sink, check the compatibility of new parts with your current system.
Step-by-Step Installation Guide
Preparing the Area
Begin by removing the old sink if applicable. Clean the area thoroughly to ensure a proper fit for the new sink and prevent any debris from affecting the seal.
Installing the Faucet and Sink
Place the faucet into the designated hole in the sink, securing it with a basin wrench. Apply plumber’s putty under the sink flange before setting the sink into place. Use mounting clips to secure the sink to the countertop.
Connecting Plumbing Fixtures
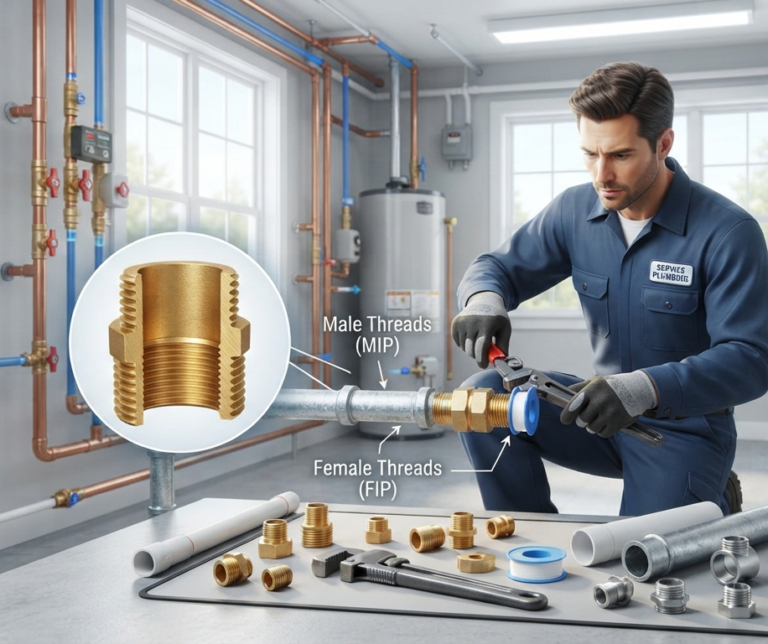
Attach the water supply lines to the faucet using Teflon tape on the NPT threads to ensure a watertight seal. You may also run into FIP or MIP fittings depending on your setup, and copper supply lines may require you to solder joints for a permanent seal. Connect the P-trap and drain pipes, ensuring they align correctly with the sink’s DWV drain outlet. Use a pipe wrench to tighten connections carefully.
Testing for Leaks
Once all components are in place, turn on the water supply and check for any leaks. Run water through the sink and inspect each connection point. Knowing what causes plumbing leaks makes it easier to spot the source quickly. If you notice any leaks, tighten the connections or apply additional sealant as needed.
Troubleshooting Common Issues
Even with meticulous installation, issues may arise. Here are some common problems and their solutions:
- Leaks: Reapply Teflon tape or plumber’s putty to seal connections. If water damage occurs before you catch it, it’s worth knowing whether homeowners insurance or a home warranty covers plumbing leaks.
- Sinks not draining: Ensure the P-trap isn’t clogged — a plumbing snake can help clear stubborn blockages — and the pipes are correctly aligned.
- Low water pressure: Check the water supply lines for blockages or kinks.
Maintenance Tips for Longevity
Regular maintenance can extend the lifespan of your kitchen plumbing. Perform routine checks for leaks, clean the faucet aerators, and flush the drain pipes periodically to prevent clogs. For a broader routine, see our guide on how to maintain your home’s plumbing systems.
Eco-Friendly Plumbing Options
Consider installing water-saving faucets or using sustainable materials like PEX piping to contribute to an eco-friendly home. These options not only benefit the environment but can also reduce your water bills.
Frequently Asked Questions
What tools do I need to install a kitchen sink? A pipe wrench, basin wrench, adjustable wrench, and pipe cutter are essential.
How do I connect plumbing to a kitchen sink? Use compression fittings and Teflon tape to connect water supply lines and drain pipes securely.
What are common mistakes in sink installation? Over-tightening connections and neglecting to check for leaks are frequent errors to avoid.
How can I prevent leaks in my kitchen sink plumbing? Ensure all connections are sealed with Teflon tape or plumber’s putty and test for leaks after installation.
Can I convert a single sink to a double sink? Yes, but it requires additional plumbing adjustments and possibly professional assistance.
With the right tools, materials, and instructions, installing kitchen sink plumbing can be a straightforward task. If this project has you curious just how far DIY plumbing skills can take you, it’s worth asking is plumbing hard to learn. Should you encounter any complex issues, don’t hesitate to consult a professional plumber — for a general sense of rates, see how much plumbing costs in Edmond. For more home improvement tips and guides, explore our related articles on kitchen remodel ideas and plumbing solutions.