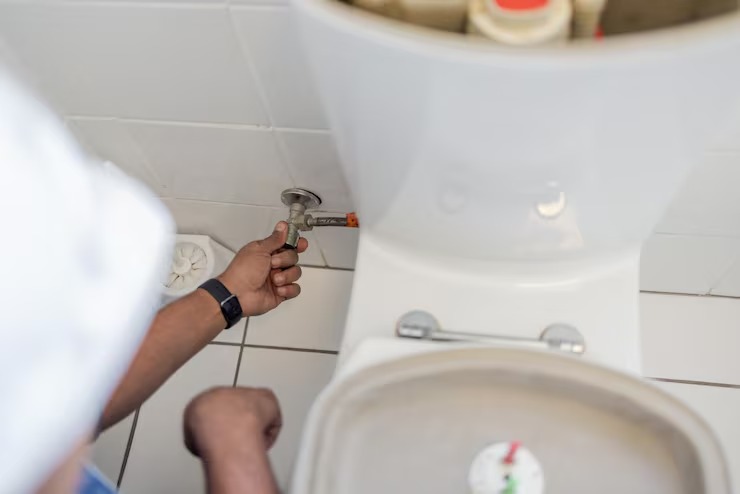
A toilet flapper is a small but important part inside the toilet tank. It controls the flow of water from the tank into the bowl during every flush. In many cases, replacing an old flapper solves common toilet leaks. However, it can be frustrating when the toilet continues to leak even after installing a brand-new flapper.
The good news is that the flapper is not always the real problem. A leaking toilet after replacement often points to installation mistakes, worn components, incorrect sizing, or issues with the flush valve itself. Some of these symptoms can even look similar to a minor clog, so it helps to first understand how to unclog toilet without plunger before assuming the flapper itself is defective.
This guide explains why your toilet flapper may still be leaking after replacement and shows you how to fix the problem step by step without unnecessary repairs.
Why Is Your Toilet Still Leaking After Replacing the Flapper?
If water keeps running into the toilet bowl after installing a new flapper, one of several issues is likely causing the leak.
Common reasons include:
- The wrong flapper size or model
- Poor flapper alignment
- A damaged flush valve seat
- Chain adjusted too tightly or too loosely
- Mineral deposits preventing a proper seal
- Cracks in the flush valve assembly
- Water level set too high
- A worn overflow tube or flush valve
Finding the exact cause before replacing more parts can save both time and money.
Signs Your Toilet Flapper Is Still Leaking
You may notice one or more of these symptoms:
- The toilet randomly refills every few minutes.
- A continuous trickling sound comes from the tank.
- Water movement appears inside the bowl when nobody has flushed.
- Your water bill increases unexpectedly.
- Food coloring placed in the tank appears in the bowl without flushing.
These signs indicate that water is escaping from the tank even when the toilet is not in use.
Step 1: Make Sure You Installed the Correct Flapper
Not every toilet uses the same flapper.
Most toilets have either:
- 2-inch flappers
- 3-inch flappers
Installing the wrong size prevents a complete seal, allowing water to leak continuously.
How to Check Remove the tank lid and compare the flapper with the flush valve opening. If the flapper seems too small or hangs over the edges unevenly, it is likely the wrong size.
Always match the replacement flapper to your toilet model whenever possible.
Step 2: Inspect the Flapper Position
Even a perfectly sized flapper can leak if it is not sitting flat.
Check that:
- Both mounting ears are securely attached.
- The flapper lies evenly across the flush valve.
- Nothing is trapped underneath.
Lift the flapper and let it drop naturally. It should settle directly over the valve opening without twisting.
Step 3: Adjust the Chain Properly
One of the most common installation mistakes involves the chain.
If the Chain Is Too Tight The flapper cannot fully close.
If the Chain Is Too Loose The chain may get caught underneath the flapper.
The ideal adjustment leaves about half an inch of slack when the flapper is closed.
Test several flushes after adjusting the chain to confirm smooth operation.
Step 4: Clean the Flush Valve Seat
A new flapper cannot seal against a dirty surface.
Over time, the flush valve develops:
- Hard water deposits
- Rust stains
- Mineral buildup
- Small debris
These prevent the rubber flapper from creating a watertight seal.
How to Clean It
- Turn off the water supply.
- Drain the tank.
- Use a soft sponge or cloth with white vinegar to clean the flush valve seat.
- For stubborn mineral buildup, gently scrub using a non-abrasive pad.
- Avoid using sharp tools that could scratch the sealing surface.
Step 5: Check for Damage Around the Flush Valve
If cleaning does not solve the leak, inspect the flush valve carefully.
Look for:
- Hairline cracks
- Chips
- Uneven plastic edges
- Warped sealing surfaces
A damaged flush valve cannot create a proper seal, no matter how many new flappers you install.
In this situation, replacing the flush valve assembly is usually the permanent solution.
Step 6: Verify the Water Level
Sometimes the flapper is working correctly, but the water level causes overflow.
If the tank water rises above the overflow tube, excess water continually drains into the bowl.
Correct Water Level The water should stop about one inch below the top of the overflow tube.
Adjust the fill valve if necessary until the water reaches the proper level. While you’re working on the fill valve, it’s worth noting that weak or uneven flow at this stage is unrelated to how to increase the water pressure in my house — that issue affects the supply line feeding the fixture, not the tank’s internal water level.
Step 7: Inspect the Overflow Tube
The overflow tube itself can become damaged with age.
A cracked tube allows water to escape constantly.
Inspect the entire tube for:
- Cracks
- Loose fittings
- Movement around the base
Replacing the flush valve assembly usually includes installing a new overflow tube.
Step 8: Test the Flapper Seal
A simple food coloring test quickly confirms whether the leak has stopped.
How to Perform the Test
- Add several drops of food coloring into the toilet tank.
- Do not flush.
- Wait 20 to 30 minutes.
- Check the toilet bowl.
If colored water appears in the bowl, water is still leaking through the flapper or flush valve. If the bowl remains clear, your repair was successful.
When the Flapper Is Not the Problem
Many homeowners replace the flapper only to discover the leak continues because another component has failed.
Possible causes include:
- Faulty fill valve
- Worn flush valve gasket
- Damaged tank bolts
- Cracked toilet tank
- Loose tank-to-bowl connection
Inspecting the complete flushing system helps avoid replacing parts unnecessarily. If you notice slow drainage alongside the leak, it’s also worth learning what is plumbing stoppage, since a partial blockage further down the line can sometimes produce symptoms that are mistaken for a flapper or flush valve failure.
Prevent Future Toilet Flapper Leaks
Routine maintenance keeps your toilet operating efficiently for years.
Helpful habits include:
- Clean the tank every few months.
- Remove mineral deposits regularly.
- Avoid harsh chemical tablets inside the tank.
- Replace worn rubber parts before they fail.
- Check chain adjustment during maintenance.
These simple steps reduce wear on the flushing system and help prevent recurring leaks.
Should You Repair or Replace More Parts?
If your toilet is relatively new and only the flapper was worn, replacing or adjusting it is usually enough.
However, if the toilet is over 10 to 15 years old and multiple components show signs of wear, replacing the entire flush valve assembly may provide a more reliable long-term repair.
Modern repair kits include updated seals, overflow tubes, and hardware that often eliminate persistent leaks in a single repair.
Final Thoughts
A leaking toilet after replacing the flapper can be frustrating, but the solution is often simpler than it first appears. In many cases, the issue comes down to incorrect installation, chain adjustment, mineral buildup, or a damaged flush valve rather than a defective replacement flapper.
By checking the flapper size, cleaning the sealing surface, adjusting the chain, inspecting the flush valve, and verifying the water level, you can usually stop the leak without replacing the entire toilet.
Regular maintenance and occasional inspections also help prevent future leaks, reduce water waste, and keep your bathroom plumbing working efficiently for years to come.